
Showing posts with label Miscellaneous. Show all posts

Friday, 25 January 2019

CT BNB - Fantasia


This tutorial was written for those with knowledge of Photoshop
If you don't have Photoshop then this can easily be converted
for Paint Shop Pro or GIMP

~~~~~~~~~~~~~~~~~~~~~~~~~~~~~~~~~~~~~~~~

SUPPLIES:

PTU kit called Fantasia from BitsNBobs which you can get HERE
This is a kit only tutorial
Font used Teiqulato Free for the main and GelPen, Tahoma or Arial for copyright HERE

OTHER INFORMATION:

Drop shadow for this tutorial is:

Blend Mode: Multiply
Opacity: 50%
Angle: 120
Distance & Size: 5px

~~~~~~~~~~~~~~~~~~~~~~~~~~~~~~~~~~~~~~~~

Open a new document of 700x700px

In the elements folder, open BNB-frame-1.png and resize to your liking
Copy and paste that as a new layer on your canvas

In the papers folder, open BNB-paper-2.jpg and resize that to your liking
Copy and paste that as a new layer and move that to below the frame layer
With your Polygonal Lasso Tool, carefully select around the frame and Select >> Invert and delete on the keyboard

Back in the elements folder and open BNB-dove-1.png
Copy and paste that as a new layer and move below the frame
Use the same settings as the paper layer
and change the layer mode to Luminosity and Opacity to 70%

Open BNB-dove-3.png and resize (if you wish)
Copy and past that as a new layer and position
Check my final tag for the position

Below is the order of the other elements that I've used
Up to you on the size and check my tag for the position
If any of the elements are mirrored the go to Edit >> Transform >> Flip Horizontal

BNB-flower-2
BNB-bubbles-2
BNB-flower-gem-1
BNB-flower-6
BNB-angel
BNB-flower-7
BNB-bubbles-3
BNB-flower-1

Hide the background layer, merge visable, apply the
correct copyright, your name and save as png

~~~~~~~~~~~~~~~~~~~~~~~~~~~~~~~~~~~~~~~~

This tutorial was written by Neptunia Tutorials
Any resemblance to any other tutorial or tag is purely coincidental
All my tutorials act as a guide only

Sunday, 29 July 2018

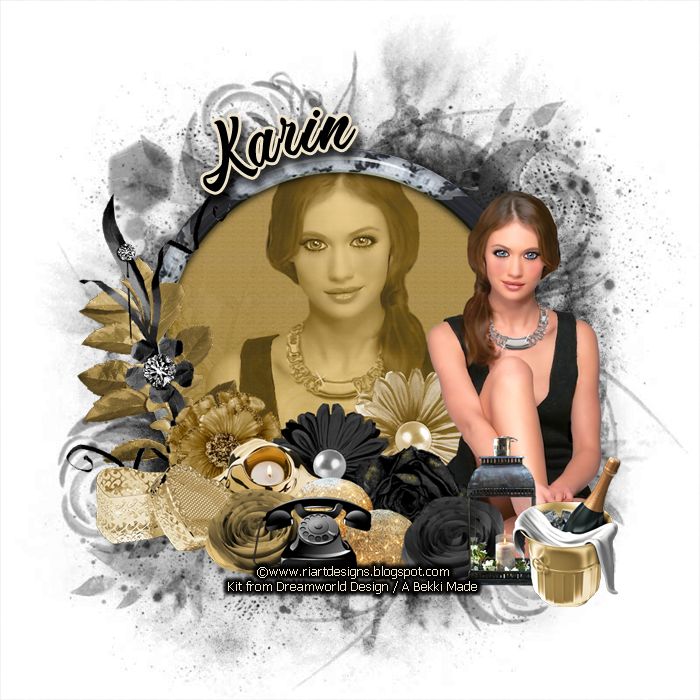
Black & Gold

This tutorial was written for those with knowledge of Photoshop
If you don't have Photoshop then this can easily be converted
for Paint Shop Pro or GIMP

~~~~~~~~~~~~~~~~~~~~~~~~~~~~~~~~~~~~~~~~

SUPPLIES:

FTU kit called BlackandGold from Dreamworld Design you can get HERE
Tube of choice, I have used a FTU one called LeahT from Riart Designs which you can get HERE
Mask used RD_Mask686.jpg from Rachel Designs HERE
Font used Romantic Beach for the main and GelPen, Tahoma or Arial for copyright HERE

OTHER INFORMATION:

These are the settings that I usually use if your using a drop shadow

Blend Mode: Normal or Multiply
Opacity: 75 or 100%
Angle: 120
Distance & Spread: 0px
Size: 10px

~~~~~~~~~~~~~~~~~~~~~~~~~~~~~~~~~~~~~~~~

Open a new document of 700x700px

In the KarinG.BlackAndGoldFrames folder, open KarinG.BlackAndGoldFrame8.png
and resize to your liking
Copy and paste that as a new layer on your canvas

In the KarinG.BlackAndGoldPP folder, open KarinG.BlackAndGoldPaper3.jpg
and resize that to your liking
Copy and paste that as a new layer and move that to below the frame layer
Click on the top layer, grab your Magic Wand tool, click in the centre of the frame,
Selections >> Modify >> Expand and in the box type in 17 and click OK
Select the paper layer, Selections >> Invert, delete on the keyboard and deselect

Open your tube of choice
Resize to your liking, copy and paste that to below the frame layer and
go to Edit >> Transform >> Flip Horizontal
Move it to where you want it to go, use the same settings as you did the paper layer
Change the layer mode to Luminosity and Opacity to 70%
Click on the top layer

Go back to your tube, undo the the resize resize it again to your liking,
copy and paste that as a new and move
Check my final tag for the position

In the KarinG.BlackAndGold folder and open KarinG.BlackAndGold003.png and resize
Copy and past that as a new layer and position
Check my final tag for the position

Below is the order of the other elements that I've used
Up to you on the size and check my tag for the position
If any of the elements are mirrored the go to Edit >> Transform >> Flip Horizontal

KarinG.BlackAndGold049
KarinG.BlackAndGold012
KarinG.BlackAndGold045
KarinG.BlackAndGold017
KarinG.BlackAndGold005
KarinG.BlackAndGold014
KarinG.BlackAndGold018
KarinG.BlackAndGold020
KarinG.BlackAndGold011
KarinG.BlackAndGold009
KarinG.BlackAndGold021
KarinG.BlackAndGold022
KarinG.BlackAndGold032

Merge visible all of the layers, open the paper that you want to
use and the mask and resize both to 700px
First copy and paste the paper, then the mask and apply
If you want to learn how to use masks in Photoshop then
you can view my tutorial here
Finally apply your name the correct copyright and save as png

~~~~~~~~~~~~~~~~~~~~~~~~~~~~~~~~~~~~~~~~

This tutorial was written by Neptunia Tutorials
Any resemblance to any other tutorial or tag is purely coincidental
All my tutorials act as a guide only
Saturday, 2 June 2018

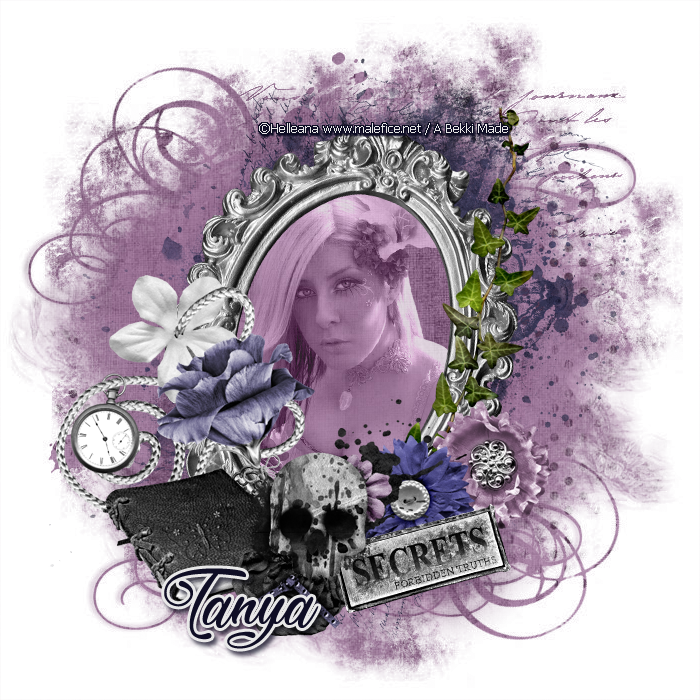
Secrets


This tutorial was written for those with knowledge of Photoshop
If you don't have Photoshop then this can easily be converted for Paint Shop Pro or GIMP

~~~~~~~~~~~~~~~~~~~~~~~~~~~~~~~~~~~~~~~~

SUPPLIES:

FTU kit called Secrets from Chaos Priestess which you can get HERE
Tube Helena_Rose_Quartz from Helleana
(Site is no longer online and I've had the tube for a while
You can snag the tube below)
Miz_Mask_056.jpg from Mizteeques Masks HERE
Font used Tale of Hawks for the main and GelPen or Tahoma for copyright HERE

Click on the above tube and save your hard drive

OTHER INFORMATION:

These are the settings that I usually use if your using a drop shadow

Blend Mode: Normal or Multiply
Opacity: 75 or 100%
Angle: 120
Distance & Spread: 0px
Size: 10px

~~~~~~~~~~~~~~~~~~~~~~~~~~~~~~~~~~~~~~~~

Open a new document of 700x700px

Open SFrameEl01 and resize to your liking
Copy and paste that as a new layer on your canvas
Use the Free Transform (Ctrl+T) and change the angle to -75

Open SPaper03 and resize that to your liking
Copy and paste that as a new layer and move that to below the frame layer
With your Polygonal Tool and Anti-alias is check, make a rough circle round your frame
Select >> Invert and Deselect

Open Helena_Rose_Quartz, remove the copyright, 
resize to your liking and copy and paste as a new layer
Edit >> Transform >> Flip Horizontal
Free Transform, change the angle to 15 and click the tick
Change the layer mode to Luminosity and the Opacity to 70%

Open SBookEl01 and resize
Copy and past that as a new layer and position
Check my final tag for the position

Below is the order of the other elements that I've used
Up to you on the size and check my tag for the position
If any of the elements are mirrored the go to Edit >> Transform >> Flip Horizontal

SSkullEl01
SFlowerEl01
SWordartEl01
SFlowerEl05
SIvyEl01
SFlowerEl02
SStringEl01

Merge visible all of the layers, open the paper that you want to
use and the mask and resize both to 700px
First copy and paste the paper, then the mask and apply
If you want to learn how to use masks in Photoshop then
you can view my tutorial HERE
Finally apply your name the correct copyright and save as png

~~~~~~~~~~~~~~~~~~~~~~~~~~~~~~~~~~~~~~~~

This tutorial was written by Neptunia Tutorials
Any resemblance to any other tutorial or tag is purely coincidental
All my tutorials act as a guide only

Saturday, 27 January 2018

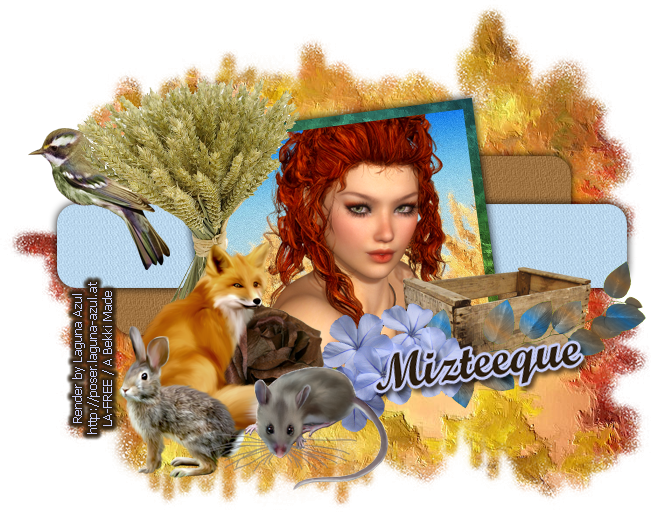
Wheat Fields


This tutorial was written for those with knowledge of Photoshop
If you don't have Photoshop then this can easily be converted
for Paint Shop Pro or GIMP

~~~~~~~~~~~~~~~~~~~~~~~~~~~~~~~~~~~~~~~~

SUPPLIES:

FTU kit called Wheat Fields from Mizteeque Digital Designs which you can get HERE
Tube LA_FREE WOMAN-HP (35) from Laguna Azul which you can get HERE
(This is on page 2 and called FREE WOMAN 35)
Miz_Mask_036.jpg from Mizteeques Masks HERE
My frame tag template HERE
Font used Sinner Script for the main and GelPen or Tahoma for copyright HERE

OTHER INFORMATION:

These are the settings that I usually use if your using a drop shadow

Blend Mode: Normal or Multiply
Opacity: 75 or 100%
Angle: 120
Distance & Spread: 0px
Size: 10px

~~~~~~~~~~~~~~~~~~~~~~~~~~~~~~~~~~~~~~~~

Open the frame tag template and it is at 700x700px

Click on the layer called one and open Miz_WF_paper  (4).jpg
Edit >> Copy, back to template and Edit >> Paste
Ctrl & T opens up the free transform tool
Select either one of the small squares that you can see and move
it so it hit the sides of the rounded rectangle
At the top click on the tick to okay the selection
Over on the Layers palette, press Ctrl and you will see a hand with
a marquee square to it and use the left right click mouse
Do this on layer 1
Click on Layer 1, Select >> Invert, click back to the layer called Layer 1, 
delete on the keyboard and Select >> Deselect
Delete the layer 1
Do the exact same for the layer named 2 but this time use Miz_WF_paper  (2).jpg

Click on the layer name 3 and open Miz_WF_paper  (7).jpg
Temporary hide the top layer and activate the free transform again
At the top you can see a small box where it says 0.00
change that to -7-50 degres
Line it up so it vagly matches to the sides, click on the tick to OK
Unhide the top layer and do the same as the pervious steps but
this time use Miz_WF_paper  (13).jpg

Open your tube and copy and copy and paste that your your template
Move that to one below, resize that to what you want, change the angle
to -7.50 degres and click the tick to OK
Ctrl and click on Layer 3, Inverse, Delete and Deselect

Right Click on Layer 4 and Merge Down
Right Click on Layer 5 and Merge Down
Double click on Layer 3 and the Layer style window pops up
Select Drop Shadow, use the same setting as given in the OTHER INFORMATION section
Repeat for the other layers

Open Miz_WF_element  (28).png and resize
Copy and past that as a new layer and position
Check my final tag for the position

Below is the order of the other elements that I've used
Up to you on the size and check my tag for the position
If any of the elements are mirrored the go to Edit >> Transform >> Flip Horizontal

Miz_WF_element  (5)
Miz_WF_element  (25)
Miz_WF_element  (7)
Miz_WF_element  (16)
Miz_WF_element  (21)
Miz_WF_element  (31)
Miz_WF_element  (6)
Miz_WF_element  (11)
Miz_WF_element  (17)

Merge visable all of the layers, open the paper that you want to
use and the mask and resize both to 700px
First copy and paste the paper, then the mask and apply
If you want to learn how to use masks in Photoshop then
you can view my tutorial HERE
Finally apply your name the correct copyright and save as png

~~~~~~~~~~~~~~~~~~~~~~~~~~~~~~~~~~~~~~~~

This tutorial was written by Neptunia Tutorials
Any resemblance to any other tutorial or tag is purely coincidental
All my tutorials act as a guide only
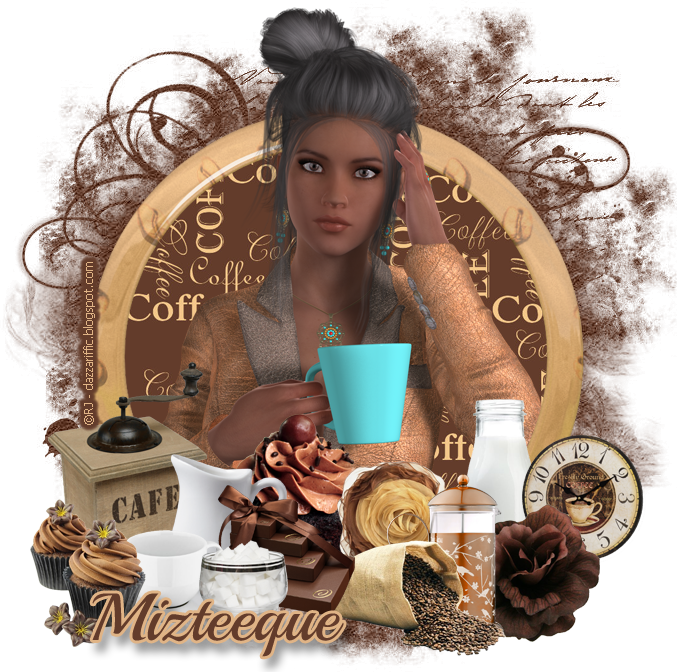
Cafe au Lait


This tutorial was written for those with knowledge of Photoshop
If you don't have Photoshop then this can easily be converted
for Paint Shop Pro or GIMP

~~~~~~~~~~~~~~~~~~~~~~~~~~~~~~~~~~~~~~~~

SUPPLIES:

FTU kit called Cafe au Lait from Mizteeques Digital Designs which you can get HERE
Tube Coffee Casual from RJ, Dazariffic which you can get HERE
Miz_Mask_056.jpg from Mizteeques Masks HERE
Font used Playball for the main and GelPen or Tahoma for copyright HERE

OTHER INFORMATION:

These are the settings that I usually use if your using a drop shadow

Blend Mode: Normal or Multiply
Opacity: 75 or 100%
Angle: 120
Distance & Spread: 0px
Size: 10px

~~~~~~~~~~~~~~~~~~~~~~~~~~~~~~~~~~~~~~~~

Open a new document of 700x700px

Open Miz_CAL_element 42.png and resize to your liking
Copy and paste that as a new layer on your canvas

Open Miz_CAL_paper 11.jpg and resize that to your liking
Copy and paste that as a new layer and move that to below the frame layer
With your Polygonal Tool and Anti-alias is check, make a rough circle round your frame
Select >> Invert and Deselect

Open CoffeeCasual4.png, resize to your liking and copy and paste as a new layer
Grab your Rectangular Marquee Tool, selcect to about or just over half way,
cut, click on the top layer, and paste
Sometimes using the CTRL, the Move Tool and move it in place exactly
Click on the top layer

Open Miz_CAL_element 24.png and resize
Copy and past that as a new layer and position
Check my final tag for the position

Below is the order of the other elements that I've used
Up to you on the size and check my tag for the position
If any of the elements are mirrored the go to Edit >> Transform >> Flip Horizontal

Miz_CAL_element 17
Miz_CAL_element 28
Miz_CAL_element 37
Miz_CAL_element 32
Miz_CAL_element 22
Miz_CAL_element 11
Miz_CAL_element 25
Miz_CAL_element 2
Miz_CAL_element 38
Miz_CAL_element 15
Miz_CAL_element 1
Miz_CAL_element 27

Merge visable all of the layers, open the paper that you want to
use and the mask and resize both to 700px
First copy and paste the paper, then the mask and apply
If you want to learn how to use masks in Photoshop then
you can view my tutorial HERE
Finally apply your name the correct copyright and save as png

~~~~~~~~~~~~~~~~~~~~~~~~~~~~~~~~~~~~~~~~

This tutorial was written by Neptunia Tutorials
Any resemblance to any other tutorial or tag is purely coincidental
All my tutorials act as a guide only
Goth Candy

To view at full size, click on the tag

This tutorial was written for those with knowledge of Photoshop
If you don't have Photoshop then this can easily be converted
for Paint Shop Pro or GIMP

~~~~~~~~~~~~~~~~~~~~~~~~~~~~~~~~~~~~~~~~

SUPPLIES:

FTU kit called Goth Candy from Toxic Desirez which you can get HERE
Miz_Mask_071.jpg from Mizteeques Masks HERE
Font used Advertising Script for the main and GelPen or Tahoma for copyright HERE

OTHER INFORMATION:

These are the settings that I usually use if your using a drop shadow

Blend Mode: Normal or Multiply
Opacity: 75 or 100%
Angle: 120
Distance & Spread: 0px
Size: 10px

~~~~~~~~~~~~~~~~~~~~~~~~~~~~~~~~~~~~~~~~

Open a new document of 700x700px

In the Elements folder, open Kristin - Goth Candy - Girlie.png and resize to your liking
Copy and paste that as a new layer on your canvas

Open Kristin - Goth Candy - Teddy.png and resize
Copy and past that as a new layer and position
Check my final tag for the position

Below is the order of the other elements that I've used
Up to you on the size and check my tag for the position
If any of the elements are mirrored the go to Edit >> Transform >> Flip Horizontal

Kristin - Goth Candy - Jelly Shot
Kristin - Goth Candy - Gumball Machine
Kristin - Goth Candy - Cupcake
Kristin - Goth Candy - Gum Pack
Kristin - Goth Candy - Ice Scream
Kristin - Goth Candy - Skull & Lollipops
Kristin - Goth Candy - Button
Kristin - Goth Candy - Lollipop 2
Kristin - Goth Candy - Lollipop 3

Merge visable all of the layers, open the paper that you want to
use and the mask and resize both to 700px
First copy and paste the paper, then the mask and apply
If you want to learn how to use masks in Photoshop then
you can view my tutorial HERE
Finally apply your name the correct copyright and save as png

~~~~~~~~~~~~~~~~~~~~~~~~~~~~~~~~~~~~~~~~

This tutorial was written by Neptunia Tutorials
Any resemblance to any other tutorial or tag is purely coincidental
All my tutorials act as a guide only

Skater


This tutorial was written for those with knowledge of Photoshop
If you don't have Photoshop then this can easily be converted
for Paint Shop Pro or GIMP

~~~~~~~~~~~~~~~~~~~~~~~~~~~~~~~~~~~~~~~~

SUPPLIES:

FTU kit called Skater from Toxic Desirez which you can get HERE
Miz_Mask_094.jpg from Mizteeques Masks HERE
Font used Street Soul for the main and GelPen or Tahoma for copyright HERE

OTHER INFORMATION:

These are the settings that I usually use if your using a drop shadow

Blend Mode: Normal or Multiply
Opacity: 75 or 100%
Angle: 120
Distance & Spread: 0px
Size: 10px

~~~~~~~~~~~~~~~~~~~~~~~~~~~~~~~~~~~~~~~~

Open a new document of 700x700px

In the elements folder, open Kristin - Skater - Frame 3.png and resize to your liking
Copy and paste that as a new layer on your canvas

In the Papers folder, open Kristin - Skater - Paper 1.png and resize that to your liking
Copy and paste that as a new layer and move that to below the frame layer
With your Polygonal Tool and Anti-alias is check, make a rough circle round your frame
Select >> Invert and Deselect

Back in the Elements folder, open Kristin - Skater - Teddy.png,
resize to your liking and copy and paste as a new layer
Use the same settings as you did with the paper layer
This will remove any of the of the element from the outside of the frame

Open Kristin - Skater - Cool Cat.png and resize
Copy and past that as a new layer and position
Edit >> Transform >> Flip Horizontal
Check my final tag for the position

Below is the order of the other elements that I've used
Up to you on the size and check my tag for the position
If any of the elements are mirrored the go to Edit >> Transform >> Flip Horizontal

Kristin - Skater - Gumpack
Kristin - Skater - Flower 3
Kristin - Skater - Ramp
Kristin - Skater - Sneakers
Kristin - Skater - Drink
Kristin - Skater - Cuppy
Kristin - Skater - Flair
Kristin - Skater - Skateboard
Kristin - Skater - Lolli 1
Kristin - Skater - Lolli 2

Merge visable all of the layers, open the paper that you want to
use and the mask and resize both to 700px
First copy and paste the paper, then the mask and apply
If you want to learn how to use masks in Photoshop then
you can view my tutorial HERE
Finally apply your name the correct copyright and save as png

~~~~~~~~~~~~~~~~~~~~~~~~~~~~~~~~~~~~~~~~

This tutorial was written by Neptunia Tutorials
Any resemblance to any other tutorial or tag is purely coincidental
All my tutorials act as a guide only