
This tutorial was written for those with knowledge of Photoshop
If you don't have Photoshop then this can easily be converted for Paint Shop Pro or GIMP
~~~~~~~~~~~~~~~~~~~~~~~~~~~~~~~~~~~~~~~~
SUPPLIES:
FTU kit called Secrets from Chaos Priestess which you can get HERE
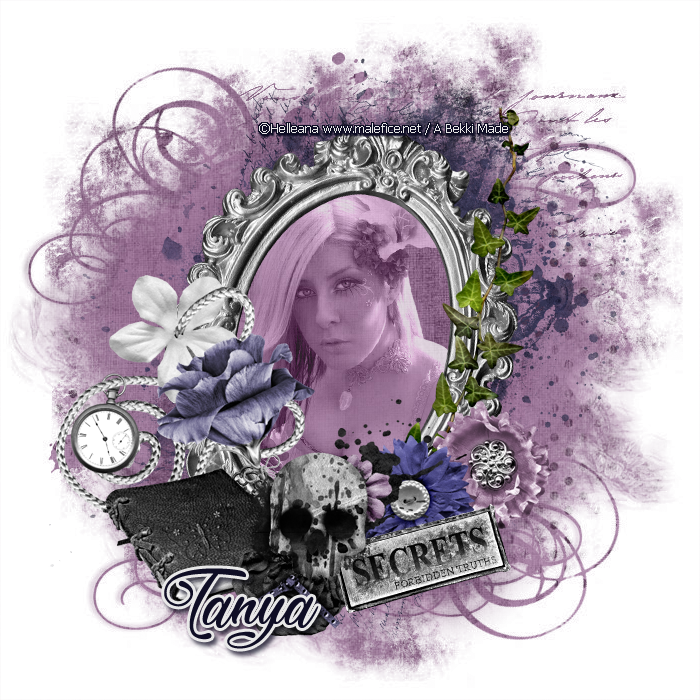
Tube Helena_Rose_Quartz from Helleana
(Site is no longer online and I've had the tube for a while
You can snag the tube below)
Miz_Mask_056.jpg from Mizteeques Masks HERE
Font used Tale of Hawks for the main and GelPen or Tahoma for copyright HERE

Click on the above tube and save your hard drive
OTHER INFORMATION:
These are the settings that I usually use if your using a drop shadow
Blend Mode: Normal or Multiply
Opacity: 75 or 100%
Angle: 120
Distance & Spread: 0px
Size: 10px
~~~~~~~~~~~~~~~~~~~~~~~~~~~~~~~~~~~~~~~~
Open a new document of 700x700px
Open SFrameEl01 and resize to your liking
Copy and paste that as a new layer on your canvas
Use the Free Transform (Ctrl+T) and change the angle to -75
Open SPaper03 and resize that to your liking
Copy and paste that as a new layer and move that to below the frame layer
With your Polygonal Tool and Anti-alias is check, make a rough circle round your frame
Select >> Invert and Deselect
Open Helena_Rose_Quartz, remove the copyright,
resize to your liking and copy and paste as a new layer
Edit >> Transform >> Flip Horizontal
Free Transform, change the angle to 15 and click the tick
Change the layer mode to Luminosity and the Opacity to 70%
Open SBookEl01 and resize
Copy and past that as a new layer and position
Check my final tag for the position
Below is the order of the other elements that I've used
Up to you on the size and check my tag for the position
If any of the elements are mirrored the go to Edit >> Transform >> Flip Horizontal
SSkullEl01
SFlowerEl01
SWordartEl01
SFlowerEl05
SIvyEl01
SFlowerEl02
SStringEl01
Merge visible all of the layers, open the paper that you want to
use and the mask and resize both to 700px
First copy and paste the paper, then the mask and apply
If you want to learn how to use masks in Photoshop then
you can view my tutorial HERE
Finally apply your name the correct copyright and save as png
~~~~~~~~~~~~~~~~~~~~~~~~~~~~~~~~~~~~~~~~
This tutorial was written by Neptunia Tutorials
Any resemblance to any other tutorial or tag is purely coincidental
All my tutorials act as a guide only
No comments:
Post a Comment